.jpg)


.jpg)
 |
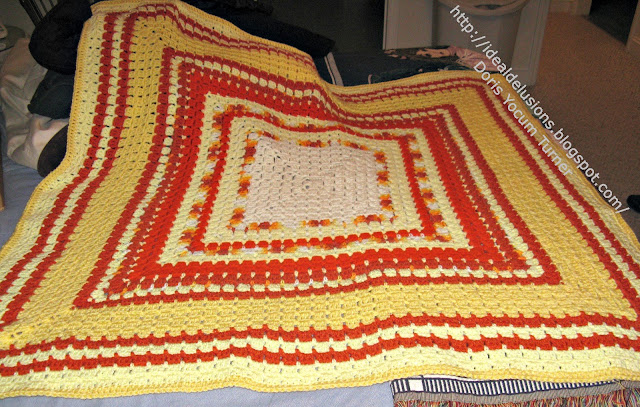
| Giant Granny Square |
This is a fairly large blanket. I had one 7 oz. skein of Red Heart Turquoise super saver and about 30 oz. of a (no label ? ) sea green/white/turquoise variegated mix yarn. From that yarn I made the above blanket, also an earflap hat and a stroller blanket.
I would suggest you get 1 - 07 oz. background skein color of your choice and about 14 to 20 oz. of a “no dye lot” color of your choice. That way if you wish to go larger you will be able to get more yarn. If you wish to go smaller you should have more than enough.
To the best of my knowledge there are a limited number of basic crochet stitches, chain st, slip stitch, single crochet, half double crochet, double crochet, treble crochet, double treble......
However these limited number of stitches are used in an amazing number of combinations to create stitch patterns. We then repeat those stitch patterns to shape our items. I have been practicing the art of crochet for over 56 years and I have found that over the years stitch patterns as well as the items we make from those stitch patterns come in and out of fashion and that is why I maintain the idea everything old is new again. The same basic stitches worked in the same old patterns but with new names. I constantly find “old” stitch patterns with names that are new to me. I tend to use the “old names” but always advise the stitch pattern may have several other new names.
It would seem what I refer to as the box stitch or block stitch in this pattern is not readily found on the web so I will showcase it here.
For the pattern above, start the same as a regular granny square. You can start with your chain 4 sl st in first chain to form a ring or your magic ring, slip ring, slip loop, starting ring (whatever you prefer to call it)
Round 2: Sc in 2 chain corner space, *(ch 3, sc in same corner, chain 3, sc in next corner) around end, join with a slip stitch in the first sc.

NOTE: Color changes throughout are of your own choice but always start on a sc /chain rnd.
Rnd 3. Sl st in corner loop, ch 2, 2 dc, ch 2, 3 dc, in corner, work 3 dc in each ch 3 sp between corners, in each corner loop work 3 dc, ch 2, 3 dc. around. join to first dc.
To add new color:
Sc in any 2 chain corner space, *(ch 3, sc in same corner, chain 3, sc in next corner) around end, join with a slip stitch in the first sc.


If you wish to make small blocks you can stop as soon as you have the size block you want and join them in the traditional way.
 |
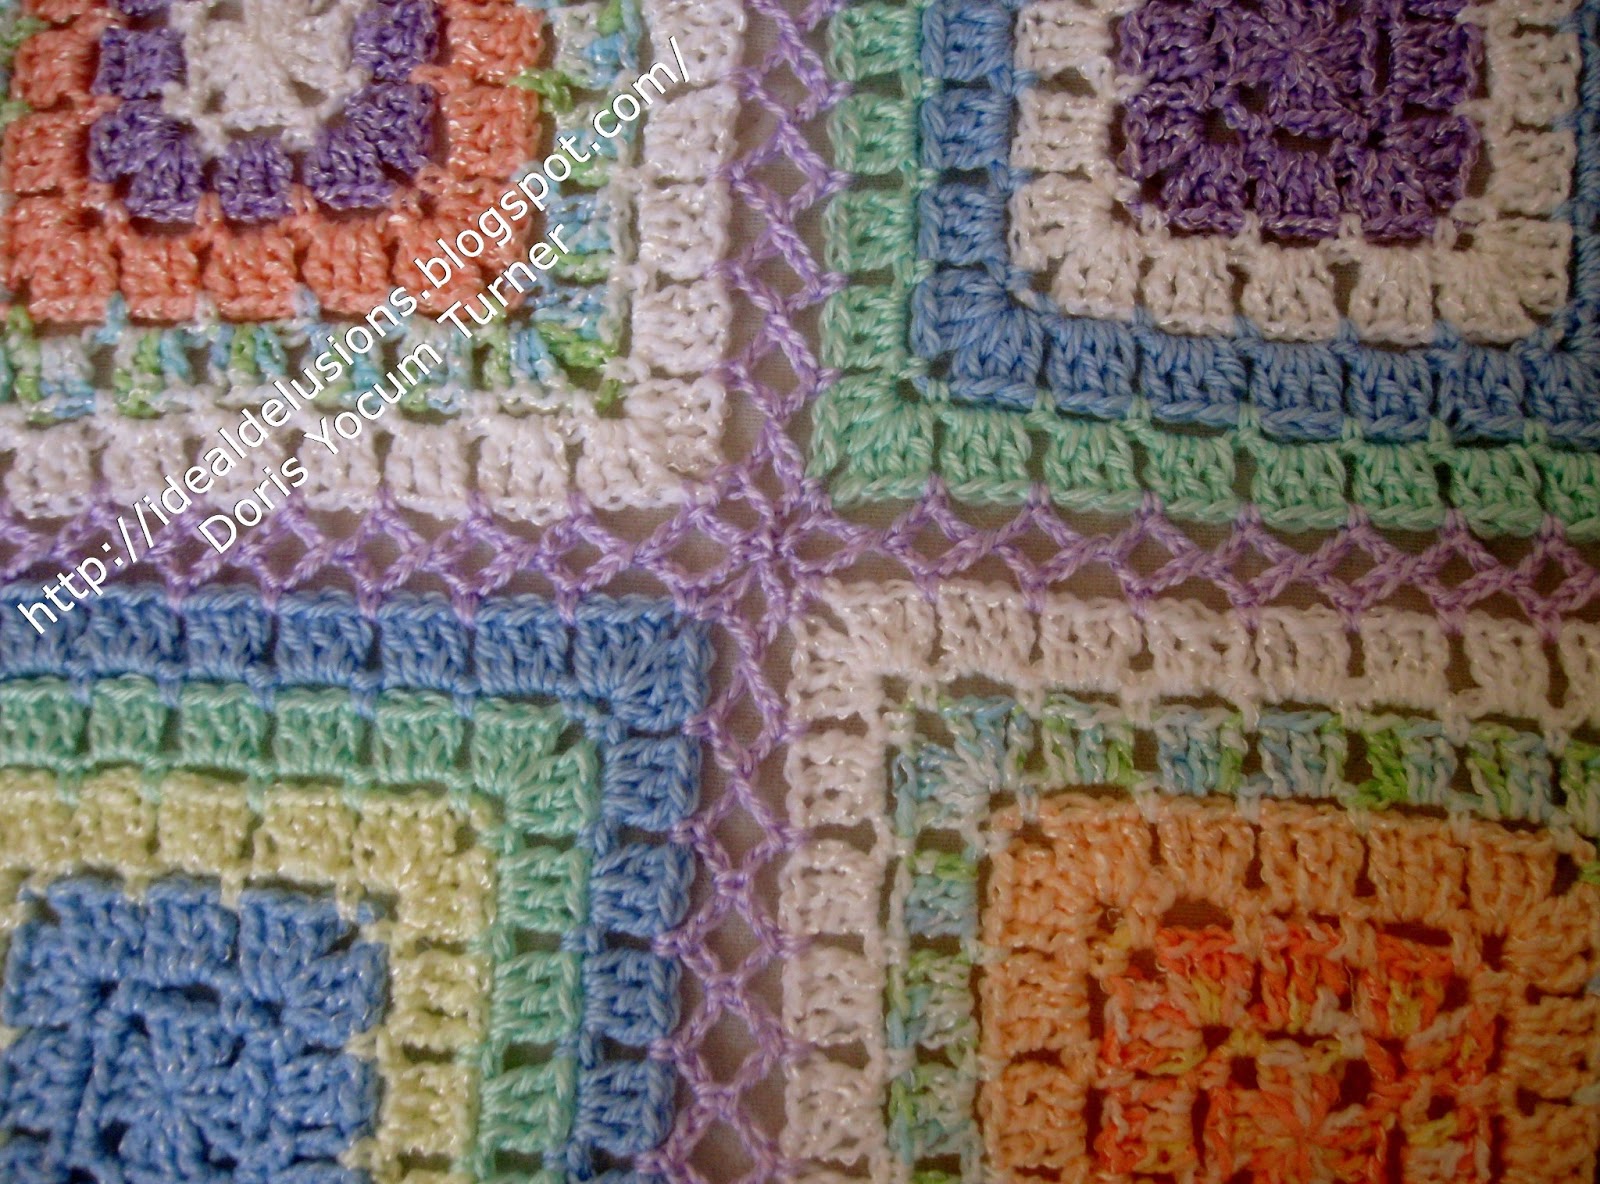
| Sweet Candy Sprinkles |
I used the Continuous Join method to connect Granny squares, it is in two parts and I have included the links for those videos.
http://www.youtube.com/watch?annotation_id=annotation_282853&feature=iv&src_vid=PoBG9W9rpog&v=foQB6X8q2a0
NEW !
http://babylovebrand.net/2013/08/27/continuous-join-as-you-go-again/

For a giant Granny square afghan, Start the center like a granny square, so you have 4 groups of 3 dc with ch 2 space between each group. Join do not turn,
NEW !
This is an “off site” link and is NOT one of mine. I cannot provide a PDF copy.
If you would like a written version of the continuous join as you go complete with photos http://babylovebrand.net/2013/08/27/continuous-join-as-you-go-again/
This can be made as Granny Square blocks, a Giant Granny Square Afghan or even a Giant Rectangle.

I used a Susan Bates I - 9 hook and worsted weight yarn
The afghan above was a stash buster so I do not know the amount of yarn required.
Round 2: Sl stitch into 2 ch corner space, sc, ch 3, sc in same place, ch 3, sc in next corner, ch 3, sc in same space around. Join to 1st sc.
Round 3: Sl st into the ch 3 corner space, ch 3, 2 dc, ch 2, 3 dc all in corner space, 3 dc in next 3 ch space, 3 dc, ch 2, 3 dc in next corner around. Join in the top of the ch 3.
I finished this one on a double crochet round for a crisp/solid edge. If you wanted to add a different border I would probably end on a single crochet round for more flexibility of choice.
Round 3: Sl st into the ch 3 corner space, ch 3, 2 dc, ch 2, 3 dc all in corner space, 3 dc in next 3 ch space, 3 dc, ch 2, 3 dc in next corner around. Join in the top of the ch 3.
Repeat rounds: 2 and 3 for pattern until desired size is accomplished
On each single crochet row You will be working (sc, 3 chain loop, sc) in each corner, (ch 3, single crochet,) between each 3 dc group of the previous row to the next corner, around, ending with sl st to first sc.
On each double crochet row work (3 dc, ch 2, 3 dc, in each corner) and 3 dc in each 3 ch space across the row between corners.I finished this one on a double crochet round for a crisp/solid edge. If you wanted to add a different border I would probably end on a single crochet round for more flexibility of choice.
For all blankets using this stitch please see:


